

How to Apply for Permanent Residency via Express Entry CEC (Filipino Citizens)
How to Apply for Permanent Residency via Express Entry CEC (Filipino Citizens)
Skip to application process and don’t care for my musings?
In six days I would be residing in Canada for about four years. Four wonderful years filled with self-realization, careful open-mindedness, character stretching, and some growing pains. Five years ago I planned to immigrate to a country I’ve never been, to make my own living and future. I must admit, the end goal towards my plan seemed a little out of reach. It felt like I was taking forever… thinking, “Will I ever finish this through? When?” But lo and behold — just a few days ago I received the privilege to stay in Canada as a permanent resident. I was over the moon. Thank you, Jesus.
I landed with a study permit in 2013 in Vancouver, BC (beautiful place), and wrote a how-to about the study visa process for Filipinos. Apologies for not having replied to some comments and emails. It’s gotten a little overwhelming for me (sadly I am a lazy blogger) and most of the questions are either too relative (this lady has no idea about the extra process nurses or pharmacists go through, I’m in IT) or subjective (do you think x is a good school?).
But good news is, most of the information you need is a Google search away. It is honestly very easy to gather the required information online. *pep talk coming* If you really want this, you will spend the time to obsessively read through government infosites and forums.* pep talk ends* The best source of all info I had was the IRCC website itself. Totally commend the Canadian government for providing accessible straightforward information! I’ve applied online for both my study visa and PR myself and of course, so can you. Only get an agency to do this on your behalf if you are willing to spend $$$ for convenience and their expertise. I understand that some people don’t have the time to research all these things through.
Overall, I’m hoping this post continues to help people. Specifically those who also came on study visas and want to move on to the next step, if they so wish to stay. (Also thanks to Chad for encouraging me to write this or else I wouldn’t have thought to)
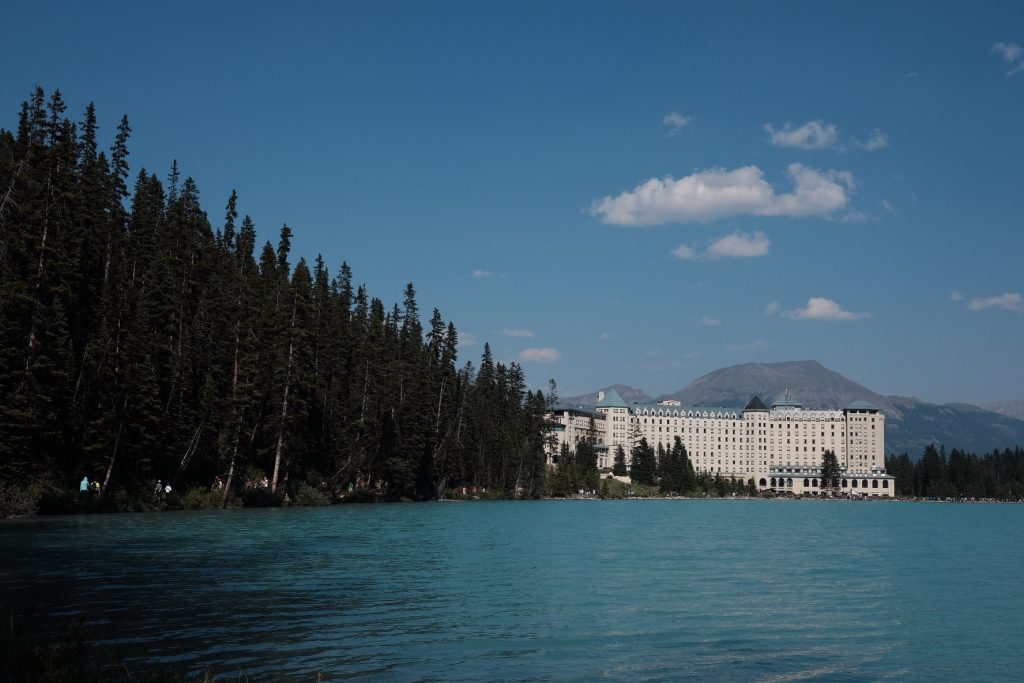
Fairmont Chateau Lake Louise, AB
KNOW THIS FIRST: You do not apply for Canadian Permanent Residency immediately, specifically in Express Entry. You create a profile and get assessed a score. Based on your profile, you will also find out which streams you are eligible for: Canadian Experience Class, Federal Skilled Worker, and Federal Trades Worker. You are then put in a pool against other candidates. If you reach the minimum score on a draw, you may then be invited to apply for permanent residency. You will have 90 days to gather requirements and submit application. Click me for more info.
Helpful links:
- Canada’s official website
- IRCC’s Help Centre
- IRCC’s Twitter – try sending them a tweet!
- Processing times
- FAQ
- Become a Candidate for Express Entry
- Express Entry invitation rounds – refer to this as your baseline score
- Comprehensive Ranking System (CRS) Criteria – scoring criteria
- National Occupational Classification (NOC) – know your occupation’s NOC code
- What you need to know before you start
Note: I did have a friend who already went through the old (paper) process of PR and he was extremely helpful, especially when it came to questions about the forms and documentation. I believe I wasn’t too annoying because currently, the Express Entry online application is very streamlined – so yay for us! 😀
Disclaimer: Canada updates its immigration rules fairly frequently. It is possible that by the time you read this, this info would already be outdated. Again, best to refer to official website.
This post is personal experience specific to Express Entry – Canadian Experience Class (Filipino citizenship).
Start an Express Entry profile with a valid work permit:
- See if you qualify for PR and reach minimum requirements. The big thing for me was to have at least 1 year Canadian work experience. Know your NOC. Ex. at the time of application I was a web/mobile programmer for games so my NOC is 2174.
- Take the IELTs or an accepted language test. Make sure there is a testing centre near you. IELTS cost $300. The higher your score the more points. You also have to meet the minimum required for your NOC. Make sure to put mother tongue as “Tagalog”, not English. To be safe, aim for at least 7 (IELTS).
- If you didn’t apply for your study permit online, create an account and within it, apply for Express Entry online. Otherwise just use your old CIC credentials. You will get a list of required documents to upload based on your answers from the wizard.
- At this point, you will only input data such as basic personal info, contact details, employment history, travel history, etc. You will later need to provide proof for everything you’ve declared if you get invited to apply for PR. So make sure you can support your profile.
- Plus any other requirements they ask… Submit entry for express entry! You can update your profile anytime, and your score will change according to your current circumstance. Ex. you could lose points for aging, or gain points when you add foreign work experience.
Is there a guaranteed way to get an invitation? Yes, kind of. Apply and be approved under the Provincial Nominee Program (PNP). This earns you 600 points, consequently skyrocketing your profile up the ranks. If you graduated with a Masters or PhD, you may be eligible to apply for PNP right after graduation.
To give you an idea, the following is a list of documents you might be expected to prepare.
Upon receiving an invitation to apply for PR:
- Medical Exam – I waited until I received notice to do it. You will have the option to go for an “upfront” medical exam. This is the quickest and easiest! Call an accredited CIC doctor, book an appointment and bring your papers. The results are valid for 1 year. It cost me $220.00.
- Gather necessary employment documents – Certification/Letter of Employment stating salary, hours, start date, paycheques, boss’ contact details, etc. from current and past employers.
- Make sure you have your education transcripts and proof of diploma/degree/masters.
- Police check – get an NBI Clearance. Plan this out! The easiest way for us to prove a clean record is to get this by visiting the Philippines. This could potentially delay your application especially if you get “hit” so plan ahead. I’ve heard there is a way to get this clearance from Canada but apparently it takes long.
- you need police clearance from all the countries you’ve lived in (for more than 6 months)
- Prepare proof of funds – bank statements of all accounts, investments portfolios, RRSP, TFSA, trading accounts, credit card statements (given you have good credit score), and any financial agreements.
- Relative or host’s scan of PR cards and proof of relations (birth certificate, marriage certificate, proof of common-law partnership) – only if you have a relative/partner who is a citizen or PR. (optional – just extra points)
- Know your travel history – this can take a lot of time if you travel a lot. You’re going to scan all pages of your passport showing stamps and visas. Having a valid US visa, I feel, seems to be advantageous. You might need your old passport.
- Digital photos – head to a Walmart Photo Centre, London Drugs, or any studio that takes ID photos.
- Letter of Explanation – optional; only if you need to provide more information.
- Pay the fees and keep the receipts:
- application fee: $550
- Right of Permanent Residence Fee (RPRF): $490
At a later point, you may receive correspondence via email and not from the IRCC account. Make sure you declared a current and working email address.
Call for interview: Bring the documents outlined on your notice. It’s a formality, and hopefully you will get your Landing paper today!
First come, first serve – maybe 8 people or so had the same schedule as me. I was second in line because I thought to arrive early not being familiar with the place. Went in, lined up as if we were waiting to pay at a teller. Someone called my name and asked for my passport, RPRF receipt, and photos. She asked me a few questions, I signed a few papers, and she stamped my passport. PR card would come in the mail maybe 3 months from now, she said. That’s it!
The process for Express Entry was quicker than expected. How fast your application moves may depend on how quick you submit the right documents, or your specific circumstance. For processing times, check here.
My experience may differ from yours. Nonetheless, pray fervently, try not to get into trouble, keep your finances in check, and you will be fine! Hope this helps you. God bless.


LAb U! 🙂 good job! you’ll be helping lots of people jud! 🙂
Hi Lorraine! Thank you for this helpful info. I bookmarked your post about student visa since my beau is actually on the process through agency. Your post is helpful and now.. this. Again.. thank you for your kindness. Hope you enjoy your stay in Canada. Congratulations! God bless!
Hi anne, did you apply under CEC or thru PNP?
Nope! Thru Express Entry.
Hi Anne,
Thank you for sharing these tips. It’s helpful to see the process through a fellow Filipino. I am currently processing my student visa but I went through an agency. I only came upon this today so it was too late for me. I am interested in applying for PR after my studies.
I have a question regarding the application for PR after completing studies in Canada. After graduating from your course, did you go back to the Philippines and completed all the requirements there? I hope to hear from you soon!
Hello Josef, no I didn’t have to go back to the Philippines since my student visa was still valid while I waited for my work permit. You cant apply for PR right after studying, you need to get a post-graduate Work Permit first, gain some work experience, and then qualify for PR via Express Entry.